
Tutorial by Jcuttlebear01 aka JoAnn
9/15/2010
I do these tutorials for fun and not
for any profit. I use them also as a learning tool to
help others learn the fun and art of paint shop pro.
All things I use are collected, the only thing I claim
Is the tag I make with these as my work.
Feel free to share my tutorials, but link them back
to my site please
Scrapbook kit is by Wickedprincess aka Shani.
This kit is a FTU.
Be sure and check out her other wonderful kits.
here is the linkhttp://wickedprincessscraps.blogspot.com/2010/08/day-5-of-freebies-ovarian-cancer.html
orHERE
Supplies
Tube of choice
Or one in supplies HERE
Font of choice~I used Apricot its in the
supplies if you want it.
Open new image 700 X 600
Open
WP_HW_SCALLOPEDPAPERCIRCLEFRAME
Copy and paste onto your new image.
Resize by 90 percent.
Magic wand and click on the inside of the frame.
Selection modify expand by 7
Find a paper you want to use
for you background in the frame, I'm using
WP_HW_PP 20
Resize by 70 percent, copy and paste
as a new layer, selection invert>delete.
Layer arrange move down
deselect
In layer pallet activate your frame
Magic wand and select inside the frame.
I'm using WP_HW_PP 7
Copy and paste as a new layer
With mover tool arrange it how you want it.
Selection invert>delete.
Deselect
Layer arrange move down
Find the tube your going to use.
I used the poser fair by @medi
If you use the one I did be sure and use
the copy write with it.
Copy and paste as a new layer
Image resize by 60 percent.
Move to where you want it.
Add a drop shadow
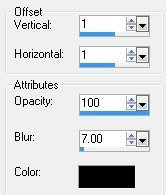
I then added WP_HW_ROSECANDLE
Copy and paste as a new layer.
Resize by 50 percent, place how you
want it.
Add drop shadow.
I added the chair>resize by 60 percent
move below your tube arranges how you want it.
Add drop shadow
Add the pillows of choice
Resize by 30 percent.
Place where you like them.
Add drop shadow
I then added WP_HW_SILVERDOODLE 2
adjust change the color to go with
your tag, this is what I used.

Copy and paste as a new layer>resize by
50 percent layer move down just above the
bottom layer.
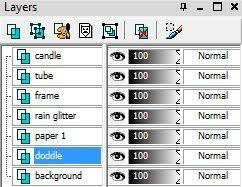 Image mirror, with deform tool turn the
doodle and arrange it how you want it.
Add same drop shadow.
Layer duplicate>image>Mirror>image>flip
Move it how you want it.
Layers>merge down
Layer duplicate>image>mirror
Layers>merge down.
This is how mine looks so far.
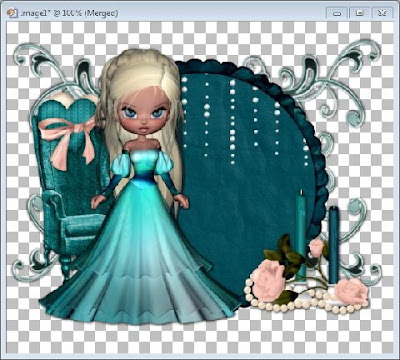
Paper of choice I'm using
WP_HW_PP 3
Copy and paste as a new layer>
Layer arrange send to bottom
Mask of choice or the one I supplied.
KLS-mask-07
Layers>load/saved mask>from disc
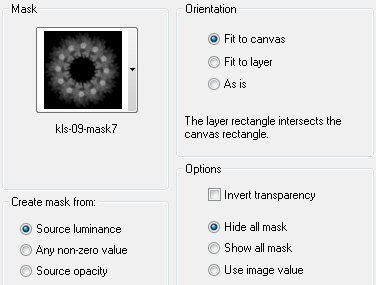 Layers>merge group
If you want the mask darker
then just duplicate it>layers>merge down.
Effects inner bevel
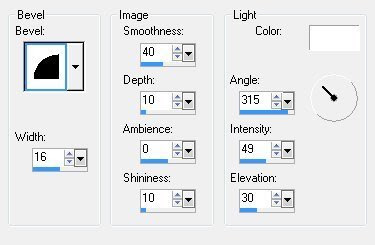
Add anything else you wish to at this time.
Add a new layer, and add your water marker>merge all layers
re size to your liking and your now ready to save your tag.
Would love to see what you do with this.
Thank you for giving my tutorial a try.
I do hope you have enjoyed this tutorial, and learned
something new.
Have any questions or need help.
Just let me know, I'm always happy to help any way I can.Jcuttlebear01@aol.com
Here are 2 I did with the kit.
