skip to main |
skip to sidebar
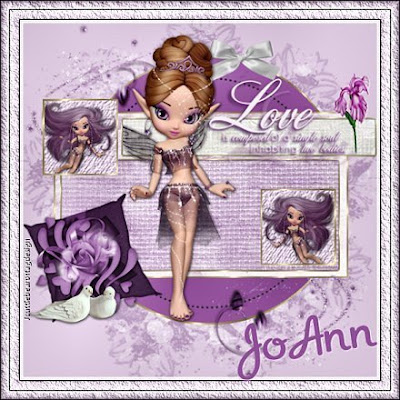 Tutorial by Jcuttlebear01 aka JoAnn
4/22/2010
I do these tutorials for fun and not
for any profit. I use them also as a learning tool to
help others learn the fun and art of paint shop pro.
Everything I use I have collected don't claim to have
made anything other then the tag.
Notes:
All settings will remain the same unless otherwise noted
This tutorial assumes you have a working knowledge of PSP
Remember to save often in case your psp crashes.
I did this in PSP 9 but sure any one will work.
Scrapbook kit is the wonderful work of
Immortal Dreams AKA Missy Lynn
It is called Lavender Spring (T)
you can purchase the kit HERE
Supplies:
Tubes of choice.
Font of choice.
It is by Melissaz Creationz
Template #71 HEREMask HERE
Plug ins:
AAA frame works HEREFilters unlimited HERE
Download all supplies needed,
open and minimize them in
your psp.
Place mask in your psp mask folder.
Install any plug ins you need.
Open the template and hit shift D on your key board
and make a duplicate, close the original.
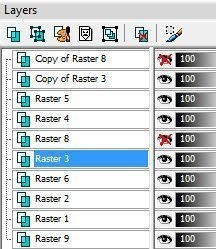
Delete layer 11 you see here in the layer pallet.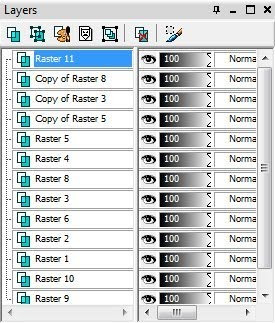 Highlight layer 9 select all, select float, select and defloat.
Flood fill with a color you have picked from the tube
your using. #ae6cb6 color I used.......or use scrapbook paper.
Select ~ modify
Add a new layer and flood fill with a nice gold pattern.
Deselect
Layers merge down.
Highlight layer 10 I didn't do anything to that,
layers merge down.
Highlight in your layer pallet layer 2 select
Flood fill layer with a color or a paper from a scrapbook kit.
I used paper 15 copy and paste into selection.
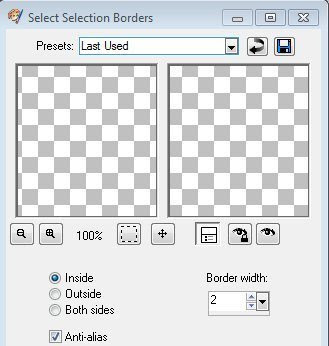
Select ~ modify ~ Select Selection Borders
same as you just did above.
Add a new layer and flood fill it with the gold patter.
Deselect
Layers merge down
Highlight layer 6 in your layer pallet.
Select all~select float~select de~float
I used paper 10 from kit.
Copy and paste as a new layer, invert and hit delete on
your keyboard.
Select ~ modify ~ Select Selection Borders
same as you just did above.
Deselect
Layers merge down.
Highlight layer 4 in your layer pallet.
Select all~select float~select de~float
Flood fill with a color or use a paper from kit.
I used paper 18
If you use a paper copy and paste as a new layer, invert and
hit delete on your key board.
Select ~ modify ~ Select Selection Borders
same as you just did above.
Deselect
Layers merge down.
In your layer pallet close off raster 8 and the copy of 8
Highlight layer 3
select with magic wand and flood fill with color
of choice, I used #e6d3e9
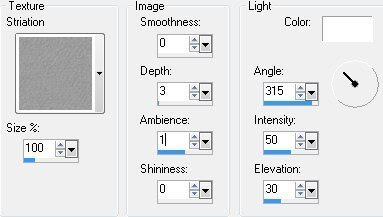
Effects texture effects and pick one
you like. What I used.
Select ~ modify ~ Select Selection Borders
Add new layer and flood fill with the gold.
Deselect
Now you can un hide layer 8 or not use it at all
It is totally up to you.
Open the tube you wish to you resize as needed.
I used one of the fairies from the kit and resized her
by 20 Percent, move her how you want
then erase any thing you don't want showing
out side the frame.
Give your tube a nice drop shadow.
Layers merge, merge down.
Do the same with the copy of layer 3 as you just did.
I added the fairy again and mirrored her.
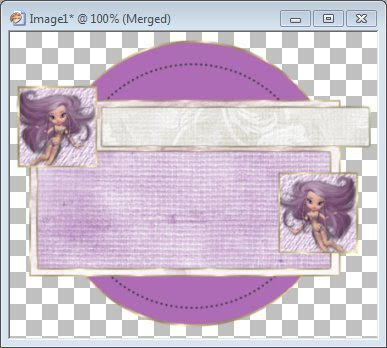
If your happy with what you see Layers>Merge>Merge Visible,
What I have so far........I didn't like the stitching around the little frames
so I just deleted it, and didn't like the one on the other frame there you see
in white so deleted it also.
Add a new layer and send to bottom, flood fill with color of choice.
This will be your background.
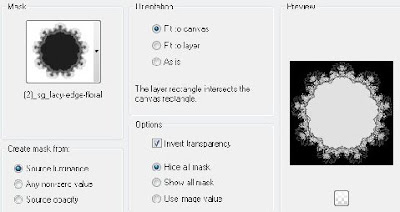
Now add the mask, the one I supplied or one of choice.
Go to layers > Load saved mask > Load mask from disk
Find your mask, make sure your settings are the same as mine,
and hit load.
in layer pallet delete mask, when asked say yes,
layer merge group.
I duplicated the mask a couple of times so it would stand out.
Close off the merged layer you have and then merge
visible, make sure your on the right layer when doing this.
Re size the mask down about 90 percent.
I gave the masks a drop shadow

Tutorial by Jcuttlebear01 aka JoAnn
4/19/2010
I do these tutorials for fun and not
for any profit. I use them also as a learning tool to
help others learn the fun and art of paint shop pro.
Everything I use I have collected don't claim to have
made anything other then the tag.
Notes:
All settings will remain the same unless otherwise noted
This tutorial assumes you have a working knowledge of PSP
Remember to save often in case your psp crashes.
I did this in PSP 9 but sure any one will work.
Supplies:
Tubes of choice.
Font of choice.
Or the ones I used HERE
Scrapbook kit HEREIt's a free to use kit ©by Fantasy Dreams Designzhttp://fantasydreamsdesignz.blogspot.com/
Plug ins:
AAA frame works HERE
Open new image 700 X 600
Preset tool draw a circle the size you would
like your frame to be.

 Close off your background in your color pallet.
Draw out a circle the size you would like it to be, this is your frame.
Color doesn't matter.
Object align in center of canvas, magic wand and click on the frame.
Layer and convert to raster layer.
Pick a color from your tube your going to use, or one of the papers from
the kit your using, and copy and paste it into the selection.
I used paper 15 from the kit.
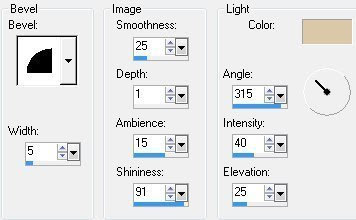
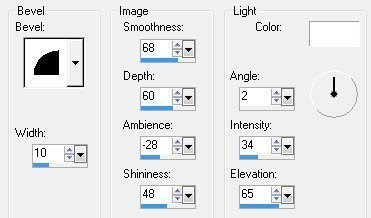
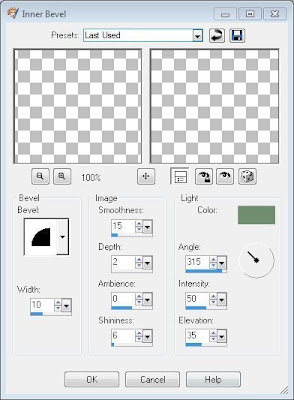
Effects 3 D inner bevel
Deselect
Select inside the frame add a new layer
copy and paste another paper of choice into selection.
I used paper 1 from the kit.
Move below frame.
Deselect
I added Accent 52 from the kit.
Add drop shadow.
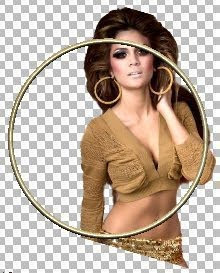
Click on the tube you wish to add copy paste as a new layer.
Mover tool and place her how you would like.
I turned the one I used with the deform tool.
Move your tube below the frame.
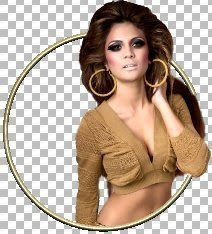
With your eraser tool go and get rid
of anything you don't want showing.
Make sure your on the right layer when your
doing this step.
This is before
After
Add a paper of choice, I used
paper 3 add as a new layer.
Layer arrange and send to bottom.
Layers load save mask
(2)_sg_lacy-edge-floral
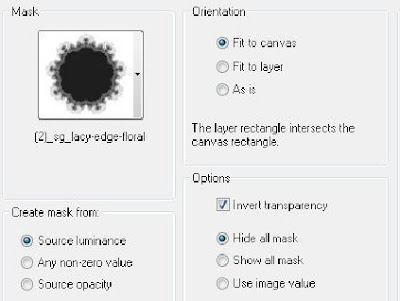
apply layers delete mask when asked say yes.
Layers merge group.
Drop shadow
Adjust brightness and contrast Clarify
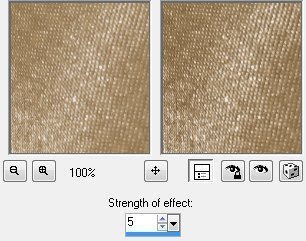
Repeat
It brightens up the gold in the mask
Resize the mask by 90 percent.
Now your ready to add some accents.
on your layer pallet you want to be on the top layer now.
Add any accents you like, resize them so they look nice and add a
drop shadow, below is what I used.
I added element 18
Take your deform tool and arrange it how you
would like it.
I changed the mode to free shift.
And just twisted it some and got it how I liked it.
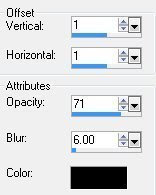
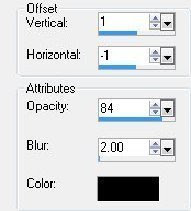
Add drop shadow same as before except change
the V and H to 1
Next I added element 57 and resized him by 80 percent.
Moved him down until he was where I wanted him.
Apply drop shadow
Add a couple of butterflies to your liking
Resized them by 50 percent.
Add a flower or bow or anything else you might
like. When happy with everything merge all layers.
Layers>Merge>Merge Visible
Then re size tag by 85%, re size all layers NOT checked
I used paper 1 for the background copy and paste
as a new layer arrange send to bottom.
crop to merged opaque, that will crop to wherever
the background ends
Add a 2 pixel border color of choice.
Add a 10 pixel border color of choice.
Selection, select all modify contract by 15, selection
invert.......effects AAA frame works
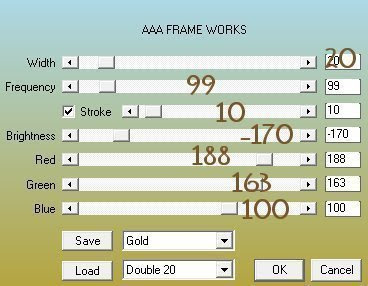
Deselect
Add a new layer and add your watermark.
You can now add a name or anything else you wish to at this time.
Re size all layers to your liking.
Your all done and ready to save your work of art.
Would love to see what you do with this.
Thank you for giving my tutorial a try.
I do hope you have enjoyed this tutorial, and learned
something new.
Have any questions or need help.
Just let me know, I'm always happy to help any way I can.
Jcuttlebear01@aol.com
tag by Mydachshund aka Barb

Tutorial by
Jcuttlebear01 aka JoAnn
4/6/2010
I do these for fun and as a learning tool.
I don't sell or make a profit from any of the
supplies I have collected. Or from writhing these tutorials.
I don't claim to have done any of the graphics and that, just the tags
I make and share.
Some knowledge of psp is most helpful.
Supplies
Graphic of choice
Tube of choice
Font of choice
I used AR BONNIE
Or you can use mine HERE
Plug ins
Filters unlimited HERE
Graphic plus HERE
Alien skins Xenofex 2 HERE
PSP 9
or any other will do.
Open graphic of choice and duplicate
and close the original.
Pick a light color from the graphic for your foreground,
and a dark color for the background.
Pick a nice gold color to use, from your
textures, I'm using the gold bead.
Re size your graphic to
400 X 300
1. Add a 5 pixel border white, select it and flood fill with the gold pattern.
2. Selection invert and effects 3 D cutout
 3. Repeat but change the V, and H to -2
Deselect
4. Add a 3 pixel border the foreground color.
5. Add a 5 pixel border white, select and flood fill with the gold pattern.
Deselect.
6. Add a 10 Pixel border foreground color.
select
7. effects texture effects, blinds
change the color to you background color.
 8. Effects 3 D inner bevel
Deselect
9. Add a 5 pixel border and select, flood fill with the gold pattern.
10. Selection invert and add the cutout.
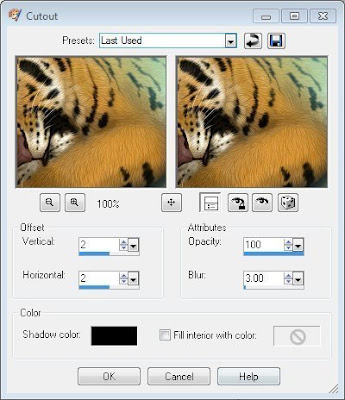
11. Repeat but change the V, and H to -2
Deselect
12. Add 3 pixel border your foreground color.
13. Add 5 pixel border, flood fill with the gold pattern.
14. Add a 20 pixel border background color,
select add a new raster layer,
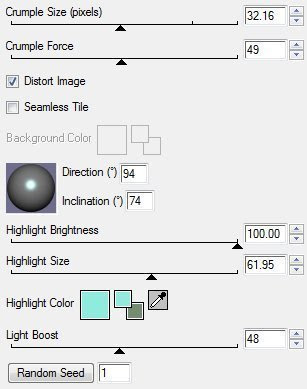
Effects, plug in Alien skins Xenofex 2 crumple
Setting glossy paper.
15. Layers merge down.
16. Effects plug in Filters unlimited Glass frame 1
 you can play with the settings and get them how you like them.
Deselect
17. Add 5 pixel border select and flood fill with the gold.
Deselect
18. Add 3 pixel border your foreground color
19. Add 5 pixel border select and flood fill with gold pattern.
Deselect.
20. Add 30 pixel border background color.
Effects graphic plus Kaleidoscope
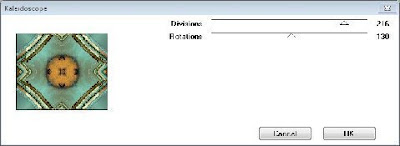
Or play around and change the setting how you would like.
Deselect
21. With your selection tools select the 4 corners.
Add same blind effect as you did earlier except change the color
to your foreground color.
Keep selected.
22. Graphic plus and add a cross shadow.Diagonal 58
Center 51
Horizontal 57
Diagonal 79
Horizontal 64
Vertical 40
Intensity 80
Brightness 128

Deselect and selection and all, contract by 30 and invert
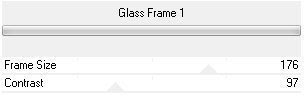
24. Effects plug in Filters unlimitedGlass frame 1
Frame size 64
Contrast 128
If happy with it deselect.
25. Add a 2 pixel border of your background color.
26. Add a 2 pixel border of your foreground color.
27. Add a 30 pixel border of your background color, select.
Add same cross shadow as you did earlier.
Add same filter unlimited glass frame as earlier.
If you wish add any accents you want to it now.
Add a new layer and place your watermark.
Merge all layers.
Re size to your liking.
After I re size I do adjust clarify to brighten it up.
Your now all done and ready to share your work of art.
Would love to see what you do with this.
Thank you for giving my tutorial a try.
I do hope you have enjoyed this tutorial, and learned
something new.
Have any questions or need help.
Just let me know, I'm always happy to help any way I can.
Jcuttlebear01@aol.com
Another one by me

Tag by GGmom9 aka Mary
Member of my psp group.
Thank you Mary

Next 2 by Mydachshund aka Barb
Member of my psp group.
Thank you Barb


 Tutorial by Jcuttlebear01 aka JoAnn
 Highlight layer 9 select all, select float, select and defloat.


 You can play with the settings until you get what you like.
 all 4 below are by